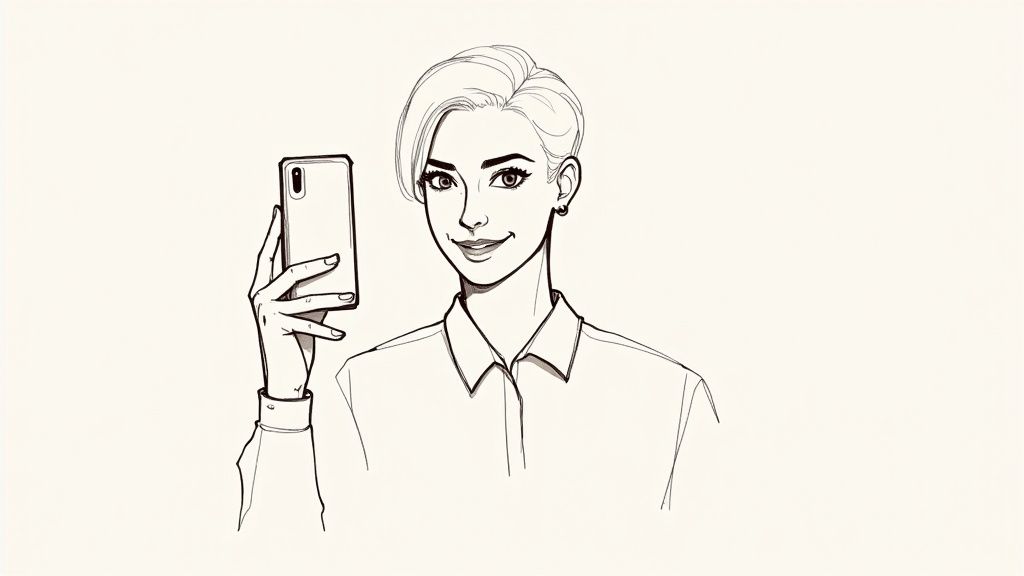
How to Take Professional Selfies for AI Headshots
Taking a professional-looking selfie is all about mastering your environment and your phone's camera. The real secret is finding soft, natural light, using a clean background, and positioning the camera just slightly above eye level for a flattering angle. This simple approach turns an ordinary photo into a high-quality base for a stunning AI-generated headshot, saving you significant time and money.
Why AI Headshots Are Your New Secret Weapon
In a world where your LinkedIn portrait or company profile is your digital handshake, a polished headshot is non-negotiable for strong professional branding. For years, this meant scheduling a session with a professional photographer—a process that involved time, coordination, and a serious hit to your wallet.
Today, the game has changed completely.
The combination of a high-quality smartphone camera and powerful AI tools has created a new, smarter path to a perfect headshot. Instead of booking a studio and spending hundreds, you can now capture a fantastic photo from the comfort of your home and let technology generate dozens of professional options. This approach puts you in the driver's seat of your professional brand, offering a level of convenience, affordability, and quality that traditional methods just can't match.
Before we dive into the step-by-step process, let's look at the foundational elements you'll be focusing on. Mastering these four pillars is the key to creating a selfie that produces incredible AI headshots every single time.
The Four Pillars of a Professional Selfie
| Element | Why It Matters | Quick Tip |
|---|---|---|
| Preparation | Your clothing, grooming, and background set the professional tone before you even press the button. | Choose solid, classic colors and a simple, uncluttered background. |
| Lighting | Good lighting is the single most important factor for a high-quality photo. It defines your features and ensures clarity. | Face a window during the day for soft, natural, and free lighting. |
| Camera & Angles | Proper camera settings and angles create a flattering, professional composition that avoids distortion. | Place your phone slightly above eye level and look up into the lens. |
| Expression & Posing | Your expression conveys personality and confidence, turning a static picture into an engaging introduction. | Aim for a relaxed, natural smile by thinking of something genuinely positive. |
These are the core concepts we'll be building on. Getting them right is simpler than it sounds, and it makes all the difference in the final product.
The Shift From Traditional to AI-Powered
The demand for professional imagery is higher than ever. In fact, the professional photography services market is expected to shoot past $60 billion by 2032, which shows just how much value people and businesses place on strong visuals. You can find more details on the growth of the professional photography industry at dojobusiness.com.
But here's the thing: meeting this demand no longer requires an expensive, time-consuming photoshoot.
By learning how to take professional selfies for AI headshots, you can sidestep the biggest hurdles of the old way:
- Massive Cost Savings: Professional headshot sessions can easily cost hundreds of dollars for just a handful of edited photos. An AI headshot generator delivers dozens of studio-quality options for a tiny fraction of that price, making it an incredibly affordable solution for individuals and businesses alike.
- Serious Time Efficiency: A traditional photoshoot involves scheduling, travel, the session itself, and then waiting days—or even weeks—for the final edits. The AI method is a game-changer; you can have a full gallery of professional portraits ready in under an hour.
- Unmatched Convenience: No more hunting for a photographer or trying to align schedules. You can take your source photos whenever and wherever you feel most comfortable and confident, turning any space into your personal studio.
The goal isn't just to take a good picture; it's to create a versatile digital asset. A great selfie is the raw material for dozens of high-end headshots you can use across all your professional platforms.
This guide will walk you through every step of capturing that perfect source image. From setting up your space to finding your best angles, you'll learn the simple techniques needed to produce a selfie that’s ready for an AI transformation, giving you professional, studio-quality results without ever setting foot in a studio.
Setting the Scene for Your Photoshoot
Before you even think about picking up your phone, the most impactful thing you can do is spend a few minutes prepping your space and yourself. Think of it like a chef doing mise en place—getting all your ingredients ready makes the actual cooking process smooth and successful. This is where you lay the groundwork for a truly professional AI headshot.
The whole point is to cut out any distractions so the final image is all about you. This breaks down into three simple areas: your outfit, your grooming, and your background.
Choosing the Right Outfit
What you wear in your selfie directly shapes the final AI headshot. Honestly, the simpler, the better.
- Stick to Solid Colors: Patterns can sometimes throw off the AI process and, let's face it, they can look dated pretty quickly. Classic, solid colors like navy, charcoal gray, forest green, or burgundy are always a safe and flattering bet.
- Mind the Neckline: A simple crew neck, V-neck, or a classic collared shirt is perfect. Steer clear of anything too trendy, distracting, or branded with large logos. You want the focus on your face, not your shirt.
- Think About Texture: A subtle texture, like you'd find in a knit sweater or a nice oxford cloth, can add a bit of depth and character without being loud or distracting.
Basically, pick something you'd feel sharp and confident wearing to an important meeting. That's the vibe we're going for.
Simple Grooming for a Polished Look
No need to book a professional glam squad. A little attention to detail here makes a huge difference in the final quality. The goal is just a clean, natural appearance.
- Hair: Give your hair a quick brush or style to make sure it's neat. Taming any major flyaways will instantly make the photo look more put-together.
- Skin: If your skin gets a little shiny, a quick pass with a blotting paper or a light touch of translucent powder can cut down on glare from the lights.
- Be Yourself: Most importantly, you should look like you. We're aiming for enhancement, not a total transformation.
Finding the Perfect Background
For the AI to really shine, a clean, simple background is an absolute must. You're creating a blank canvas. A plain, light-colored wall—think off-white, beige, or light gray—is the gold standard here. For a deeper dive, check out our guide on the best headshot backgrounds for more ideas.
No plain wall? No problem. A neutral-colored bedsheet pulled tight to get rid of wrinkles works great. You can also tape a large piece of white or gray poster board to the wall behind you.
This simple step mimics what professional photographers do in a studio, creating a controlled environment. And you’re doing it for free at home. It’s clear people are getting serious about self-shot photography; the selfie accessories market was valued at USD 4.54 billion in 2024 and is expected to keep growing. You can read more about these trends in the selfie accessories market on marketgrowthreports.com. It just goes to show how focused everyone is on creating amazing images on their own.
Mastering Light and Your Smartphone Camera
Let's get into the technical stuff, but I promise to keep it simple. You don’t need a fancy studio to get a professional-looking selfie. In fact, the best tool for the job is completely free, and you're probably sitting right next to it. The real secret to a high-end photo is mastering the light.
Great lighting is what separates a grainy, amateur snapshot from a crisp, flattering portrait. It’s what defines your features, gets rid of harsh shadows, and makes sure your final image is clear and professional. Forget about ring lights for a moment—your best friend is a window.
Let Natural Light Do the Heavy Lifting
Natural light is soft, forgiving, and makes pretty much everyone look good. The trick is knowing how to use it. You want to be facing the window, letting that gentle, indirect light hit your face evenly.
Here's the simple setup:
- Find the Right Window: Look for a window with bright but indirect sunlight. If the sun is beaming straight through and creating harsh, bright spots on the floor, it’s too strong. Either wait for a time of day when the light is softer or hang a thin white sheet over the window to diffuse it.
- Get Your Position Right: Stand or sit about two to three feet away from the window, facing it head-on. This creates what photographers call "soft light," which has the fantastic effect of smoothing skin and minimizing those pesky shadows under your eyes and nose.
- Kill All Other Lights: Mixing natural light with the warm, yellow glow from your indoor lamps will just confuse your camera’s color balance. This can lead to some really weird skin tones. Turn them all off and let the window do the work.
The goal is simple: light source in front of you. Never behind you, and never directly above you. Backlighting turns you into a silhouette, and overhead lighting creates unflattering shadows. For a deeper dive, our guide to the perfect headshot lighting setup is a fantastic resource.
Tweak Your Smartphone Camera Settings
Your phone's camera is incredibly powerful, but the default settings aren't always your friend when it comes to taking a professional selfie. Just a few small adjustments can make a world of difference.
First things first, always use the rear-facing camera. It has a much better, higher-resolution sensor than the front-facing "selfie" camera. This means your photos will be sharper and packed with more detail—exactly what you need for a high-quality AI headshot.
Next, a tiny step that makes a massive difference: wipe the lens with a soft cloth. Fingerprints and pocket lint are the number one cause of blurry, hazy photos.
Once you’re in position, tap on your face on the screen. This does two critical things: it tells the camera exactly where to focus and adjusts the exposure based on the light hitting your face, not the bright window behind you.
Finally, here are three settings to avoid like the plague:
- Turn Off the Flash: Your phone's built-in flash is harsh, direct, and just plain unflattering. It creates shiny skin, red-eye, and stark shadows. Natural light is always the better choice.
- Never Use Digital Zoom: Zooming in with your fingers just crops the image and destroys the quality, leaving you with a pixelated, grainy mess. If you need to be closer, physically move the phone.
- Use the Timer or a Remote: Tapping the shutter button, even gently, can cause a tiny camera shake that leads to a slightly blurry photo. Set a 3-second timer. It gives you a moment to compose yourself and guarantees a perfectly crisp shot.
Getting these simple techniques right is essential. Our online presence is non-negotiable now, and the demand for great images has fueled some incredible growth in related tech. The global selfie application market is projected to hit roughly $15 billion by 2033. You can explore more on this market growth at archivemarketresearch.com to see just how central these images have become. By nailing the lighting and camera settings, you're setting the stage for a perfect AI transformation.
Finding Your Most Confident Angles and Expressions
With your lighting and camera settings dialed in, it’s time for the fun part—posing. This isn't about looking stiff or unnatural. It's about finding the angles and expressions that genuinely communicate confidence and make you seem approachable.
A few simple adjustments can completely transform how you appear on camera, turning a basic selfie into a powerful professional statement.
The first and most effective trick is simply changing your camera's position. Holding your phone just slightly above eye level and angling it down creates a universally flattering look. It's a subtle shift that helps define your jawline and makes your eyes appear more open and engaging. Whatever you do, avoid taking the photo from below—it’s an angle that almost never looks professional.
Master a Few Key Poses
You don't need to memorize a dozen different poses. Having just a couple of solid, go-to options will give you plenty of great shots to choose from.
- The 45-Degree Turn: Instead of facing the camera straight on, turn your body about 45 degrees away from the lens. Then, just turn your head back to look at the camera. This is a classic photographer's trick that creates depth and looks far more dynamic than a flat, head-on shot.
- The "Turtle" Trick: This one feels a little weird, but it works wonders. To get a sharper, more defined jawline, gently push your head and forehead slightly forward toward the camera. It helps eliminate the appearance of a double chin and really strengthens your profile on camera.
This quick infographic shows the simple technical flow you should follow before you even start worrying about your pose.
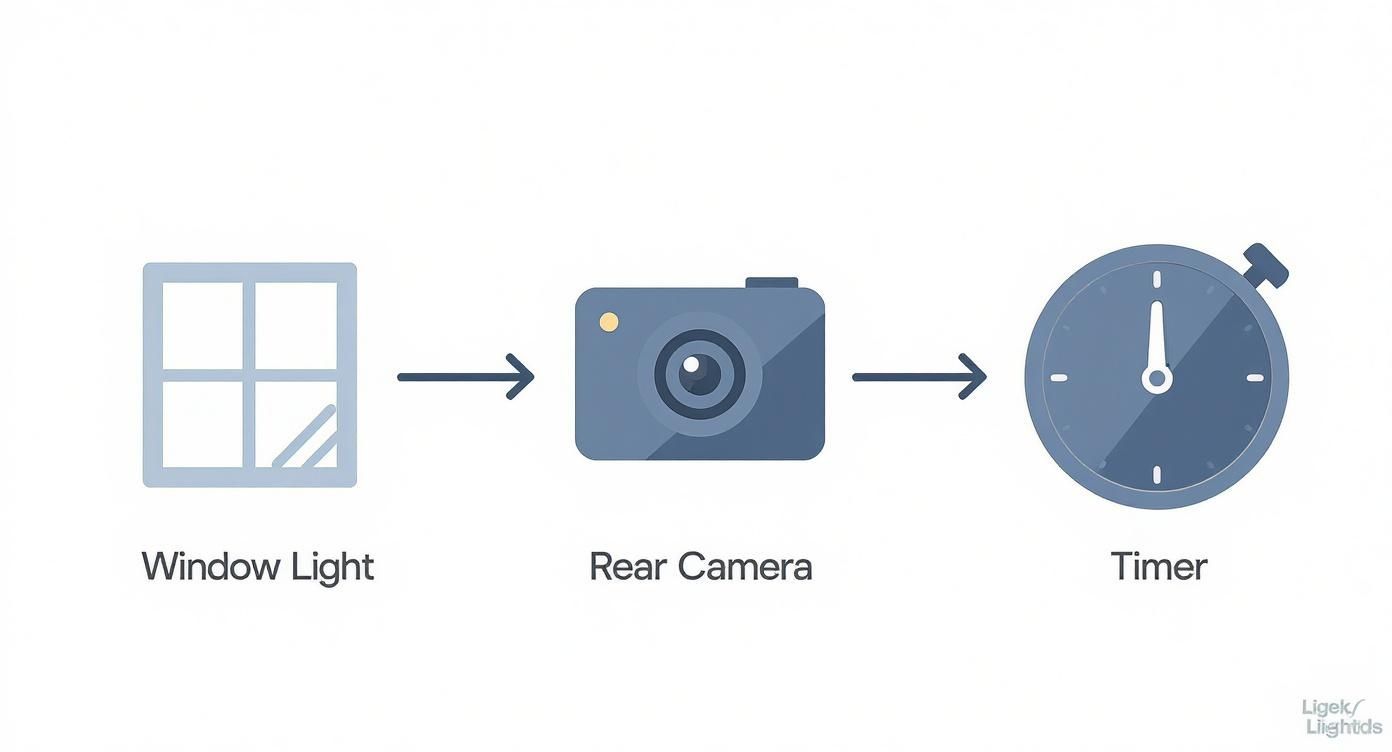
Nailing this process—using window light, your phone's rear camera, and a timer—sets the stage for high-quality images where your confident poses can truly shine.
To help you get the hang of it, here are some of the most common mistakes people make when posing for a selfie and how you can easily fix them.
Common Posing Mistakes and How to Fix Them
| Common Mistake | Why It's Unflattering | The Simple Fix |
|---|---|---|
| The "Mugshot" | Facing the camera straight-on can look confrontational, flat, and often widens the face. | Turn your body 45 degrees to the side, then turn your head back to the camera. This creates dimension. |
| Shooting from Below | This angle is notorious for creating a double chin and highlighting the nostrils. It’s rarely flattering. | Hold the camera slightly above eye level and angle it down. This defines the jawline naturally. |
| Stiff "Soldier" Shoulders | Tense, squared-off shoulders make you look rigid and uncomfortable. | Relax your shoulders, let them drop, and angle your body slightly. Leaning on one arm can also help. |
| Forced Grin | A fake smile doesn't reach your eyes and can come across as insincere or awkward. | Think of something genuinely funny or happy. Let the smile happen naturally. A slight, closed-mouth smile works great too. |
Getting comfortable with these small adjustments will make a massive difference in the final quality of your selfies.
Cultivate a Genuine Expression
Your expression is what truly connects with the person looking at your photo, so getting it right is crucial. A forced, tense smile looks uninviting, while a genuine one projects warmth and trustworthiness. The best way to get there is to stop telling yourself to "say cheese."
Instead, think of something that genuinely makes you happy—a fond memory, a funny joke you heard, or a person you love. This tiny mental shift will bring a natural light to your eyes and create a smile that feels authentic and relaxed.
Practice in a mirror for a minute to see what feels most like you. Sometimes a slight smile or a friendly, closed-mouth expression looks just as professional and engaging as a full grin. Combining these techniques will give you a variety of fantastic options to use for your AI headshot transformation.
Final Touches Before the AI Transformation
You’ve done the heavy lifting. The lighting is dialed in, your poses look natural and confident, and you’ve got a solid collection of high-quality selfies. Before you send them off for their AI makeover, a few quick, subtle tweaks in your phone's photo editor can make a surprising difference.
The goal here isn't to slap on a heavy filter—it's simple enhancement.
Think of this step like prepping a canvas before painting. The AI works best with a clean, clear, and well-defined image to work from. Heavy filters from apps like Instagram or Snapchat can actually confuse the AI by changing your core facial features, which often leads to wonky and unnatural results. We want to avoid that at all costs.
Instead, let’s focus on the basics that make your best features pop.
Quick Edits Right on Your Phone
You don’t need fancy software for this part. Your phone’s built-in photo editor has everything you need. Just open up one of your best shots and find the editing tools.
You only need to touch three sliders:
- Brightness (or Exposure): If the photo feels a bit dark, gently nudge the brightness up. The goal is to have your face well-lit without looking washed out or blown out. Make tiny adjustments until your skin tone looks natural and vibrant.
- Contrast: A tiny bump in contrast can add a little bit of life and depth to the image. It makes the darks a little darker and the brights a little brighter, helping define your features without looking fake.
- Sharpness (or Definition): Adding just a touch of sharpness can make details like your eyes and hair look crisper. Go easy here—cranking this up too high is the fastest way to make a photo look grainy and over-processed.
The golden rule of editing is simple: less is more. If you look at the final photo and can’t tell it was edited, you’ve nailed it. You’re just creating a slightly better version of the original, not a whole new image.
Once you’re happy with those minor tweaks, it's time to get your photos ready for upload.
Your Pre-Upload Checklist
Run through this quick checklist before sending your images to an AI headshot generator. Getting these details right ensures the AI has the best possible material to produce those stunning, high-quality results.
For a deeper dive, check out our complete guide on preparing the perfect photos for AI headshots.
- File Format: Save your photos as a JPG or PNG. These are the standard, high-quality formats that work perfectly with AI models.
- Resolution: Don’t compress the file. Export it at its original, full resolution. This preserves all the crucial details the AI needs to create a realistic headshot.
- No Filters: This is a big one. Double-check that you haven’t accidentally left on any creative filters, vignettes, or other heavy effects. The photo should be clean, clear, and true-to-life.
A Quick but Important Privacy Tip
Here’s one final step that’s easy to miss: removing location data from your photos. Many smartphones automatically embed GPS coordinates (this is called EXIF data) into every single picture you take.
For privacy reasons, it's always a good idea to strip this data before uploading your images anywhere online.
On most modern iPhones and Androids, you can do this right in your photo gallery. Open the photo, look for the "details" or options menu (often an "i" icon or three dots), and find an option to "Remove Location" or edit the location data before you save the final version.
With these final touches done, your selfies are now perfectly optimized and ready for their AI transformation. You've successfully set the stage for creating a powerful set of studio-quality headshots that will make you look your best.
Got Questions? We’ve Got Answers.
As you get ready to take your own professional selfies, a few common questions always seem to pop up. Let’s tackle them head-on to clear up any lingering doubts and make sure you get the best possible results.
How Many Selfies Should I Take?
More is always better. Aim to snap at least 20-30 photos in one go.
That might sound like overkill, but you'll be surprised how many are near-duplicates with just a tiny shift in your smile or the angle of your head. Having a bigger pool to pull from is your best bet for finding four or five truly great shots that nail the focus, lighting, and expression. The goal is variety, so play around with different angles and smiles.
My best tip? Don't pose for every single shot. Once your setup is right, take pictures in quick bursts. It's way easier to catch a natural, relaxed expression this way than to hold a stiff, perfect pose.
Think of it as an efficiency hack. A traditional photoshoot can eat up hours and cost a fortune for just a few edited images. You can capture a whole library of high-quality options in about 15 minutes, all for free. This time and cost saving is a huge advantage for busy individuals and businesses.
Can I Just Use an Old Photo I Already Have?
It's tempting, I know. But digging up an old photo is almost always a bad idea.
For starters, most photos from a few years ago are probably lower resolution than what your phone can do today. If it's been posted on social media, it's been compressed, which crushes the quality.
Plus, a headshot needs to look like you, right now. Your hairstyle, glasses, or overall look might have changed. A current photo ensures you’re putting your best, most accurate self forward. Taking a few fresh pictures is a small effort that pays off big in the professional quality of your final AI headshots.
What If I Don't Have a Plain Wall for a Background?
No plain wall? No problem. The background in your selfie is just there to be replaced, so all you need is something simple that doesn't distract from you.
Here are a few easy workarounds:
- A Taut Bedsheet: Grab a neutral-colored sheet (white, gray, or light beige), hang it up, and pull it tight to smooth out the big wrinkles.
- Poster Board: A large piece of white or light gray poster board taped to the wall behind you creates a perfect, clean backdrop.
- The "Portrait Mode" Shortcut: If your phone's portrait mode is solid, let it do the work of blurring the background. Just double-check the edges around your hair to make sure the blur looks natural and not choppy.
Ultimately, the background in your selfie doesn’t really matter because the AI is going to swap it out anyway. The real goal is to make sure nothing in the background is so busy that it confuses the AI when it’s trying to separate you from your surroundings.
Ready to turn your best selfie into a professional headshot? SelfieToPro uses AI to create dozens of studio-quality headshots in minutes. Skip the cost and hassle of a traditional photoshoot and get results you'll love. Try it today at https://www.selfietopro.com.