How to Take Professional Headshots at Home: A Quick Guide
Taking a professional headshot at home is way easier than you might think, and yes, you can absolutely do it with just your smartphone. The magic formula comes down to three things: soft, natural window light, a simple background, and an expression that feels genuinely confident. Nail those three, and you're well on your way to an image that looks like it came straight from a studio.
Why Your Headshot Matters More Than Ever
In a world where our first meetings happen online, your headshot is your virtual handshake. It’s the first thing recruiters, potential clients, and future colleagues see on LinkedIn, your company's website, and other professional networks. A polished, high-quality headshot doesn’t just make you look good—it instantly signals professionalism and starts building trust before you've even exchanged a word.
This isn't just a gut feeling. The data backs it up. For instance, LinkedIn themselves report that profiles with a professional headshot get up to 14 times more views than those without. That's a direct line between the quality of your image and real-world career opportunities. You can find more insights on the impact of professional imagery from industry experts.
The Shift Toward Modern Professionalism
The days of stiff, corporate portraits against a cheesy, mottled grey background are thankfully behind us. Today, it’s all about authenticity and approachability. People want to see a headshot that not only looks sharp but also gives a glimpse into your personality and personal brand. A photo that feels genuine, warm, and confident will always outperform one that looks sterile and impersonal.
Of course, getting that perfect shot has traditionally meant booking a professional photographer, which comes with its own headaches. Trying to find a time that works for both you and a busy photographer can be a real challenge.
A great headshot does more than just show what you look like; it tells a story about your professionalism, confidence, and approachability. It’s a critical investment in your personal brand.
Embracing Cost-Effective Alternatives
Beyond the scheduling nightmare, the cost of a traditional photoshoot can be a major hurdle. Professional photographers often charge hundreds of dollars for a single session. That’s a tough pill to swallow for students, job seekers, or anyone just starting a business.
This is exactly why learning to take your own headshots at home has become such a game-changer. It puts you in the driver's seat, giving you the freedom for endless retakes without spending an extra dime.
And more recently, a powerful middle-ground has emerged: AI headshot generators. Tools like SelfieToPro offer the convenience and affordability of the DIY route but deliver the polished, studio-quality results you’d expect from a professional. It's a smart, efficient way for any modern professional to save significant time and money while boosting their professional branding.
To help you weigh your options, let's break down the key differences between the DIY approach and a traditional photoshoot.
At Home vs Traditional Headshot: A Quick Comparison
This table breaks down the key differences between taking headshots at home versus hiring a professional photographer, helping you choose the best path.
| Factor | At Home Headshots (DIY) | Traditional Photoshoot |
|---|---|---|
| Cost | Free to very low (potential for small equipment costs) | $200 - $1,500+, depending on the photographer's experience |
| Convenience | Extremely convenient; shoot anytime, anywhere you have good light | Requires scheduling, travel, and coordinating with a photographer |
| Speed | Immediate. You can have a usable photo in under an hour | Can take days or weeks to receive final edited images |
| Control | Full creative control over lighting, posing, and expression | You rely on the photographer's vision and direction |
| Variety | Unlimited photos and retakes at no extra cost | Typically includes a limited number of final edited photos |
| Quality | Can be very high with the right technique, but variable | Consistently professional results with expert lighting and gear |
Ultimately, whether you decide to go the DIY route, use an AI tool, or hire a pro, the goal is the same: to get a headshot that truly represents you and your professional brand.
Prepping for Your At-Home Headshot Session
A great headshot isn't made when the camera clicks. It’s built on the foundation you lay beforehand. The prep work—from what you wear to how you feel—is what separates a forgettable snapshot from a portrait that radiates confidence and professionalism. Think of this as your pre-flight checklist.
When you know you look great and have every detail handled, you can actually relax in front of the lens. That feeling of preparedness is the secret to a genuine, natural expression. This is where you eliminate any chance of last-minute stress.
How to Choose Your Wardrobe
What you wear sends an immediate message, so it plays a huge part in your headshot's final vibe. The key is to pick something that flatters you without stealing the show. Your outfit is the supporting actor; your face is the star.
A tried-and-true rule is to stick with solid colors. Busy patterns, logos, or distracting designs pull the viewer's eye away from where it should be—on you. Jewel tones like emerald, sapphire, and deep reds look fantastic on most skin tones. The same goes for classic neutrals like navy, charcoal grey, and cream.
As you raid your closet, keep a few things in mind:
- Mind the Neckline: Simple is almost always better. Crew necks, V-necks, or a classic collared shirt frame your face without adding visual clutter.
- Fabric and Fit are Key: Go for materials that fit you well and resist wrinkling. A structured blazer, a crisp button-down, or a simple, quality blouse adds instant professionalism. Nothing should be too tight or too baggy.
- Match Your Industry: Your clothes should make sense for your line of work. A graphic designer can get away with something more casual and creative, while a lawyer should probably stick to a more traditional, corporate look.
Your outfit has to feel like you. If you're never seen in a suit, forcing yourself into one for a photo will likely make you look stiff and uncomfortable. That discomfort will absolutely show up in the final image.
At the end of the day, wear what makes you feel powerful. Try on a few options. The one that makes you stand up a little straighter? That’s your winner.
Grooming Tips for a Polished, Natural Look
Grooming is that final layer of polish. We’re not talking about a total makeover, just a few simple steps to ensure you look clean, put-together, and ready for the camera.
It all starts with your skin. For a few days before your shoot, make hydration a priority. Drink plenty of water and use a good moisturizer. This simple habit creates a natural, healthy glow that no editing software can truly replicate. On shoot day, a clean, moisturized face is the only canvas you need.
For your hair, the goal is neat and intentional. Style it in a way that’s familiar but maybe a little more polished than your average Tuesday. The most important thing is to keep it out of your face so it doesn’t cast weird shadows or, even worse, hide your eyes. A tiny bit of hairspray or styling cream can go a long way in taming flyaways.
When it comes to makeup, the goal is to enhance, not conceal. A natural look is the gold standard for a professional headshot.
- Foundation: A light, matte foundation is perfect for evening out your skin tone and cutting down on any shine from the lights.
- Eyes: A little mascara and neatly defined brows are usually all you need to make your eyes pop. Steer clear of heavy eyeliner or shimmery eyeshadows.
- Lips: A neutral lip balm or a lipstick in a subtle shade adds a nice, finished touch.
The single most important grooming tip? Don't try anything new on photoshoot day. This is not the time for a radical new haircut or a bold makeup experiment. You want to look like the absolute best version of your everyday professional self. By getting your wardrobe and grooming dialed in ahead of time, you're building a base of confidence that will shine through in every single shot.
Setting Up Your At-Home Headshot Studio
Let's clear something up right away: you don't need a fancy studio or a mountain of expensive gear to get a genuinely professional headshot. I've seen some of the most compelling portraits taken in the corner of a living room. The real magic isn't in the equipment—it's in knowing how to master your lighting and background.
When you turn a small space in your home into a makeshift studio, you’re not just saving money. You’re taking complete creative control over the final image. This is about being resourceful and using what you already have to get amazing results.
Before we even touch a camera, let's get the foundation right. That means thinking about wardrobe, grooming, and your own mindset.
This infographic breaks down the simple but crucial prep work that goes into a great shoot.
As you can see, a successful headshot is built on thoughtful preparation long before you start clicking the shutter.
Mastering Your Lighting
Lighting is everything in photography. I can't stress this enough. It’s what sculpts your face, sets the mood, and draws the line between a quick snapshot and a professional portrait. Get the lighting right, and you look vibrant and engaging. Get it wrong, and you can end up with harsh shadows that make you look tired or flatten your features.
The best news? Your best light source is probably free. I'm talking about natural light from a window. A large, north-facing window is the holy grail for photographers because it gives you bright, soft, indirect light that's incredibly flattering. No north-facing window? No problem. Any window that isn't getting blasted with direct, harsh sunlight will do the trick.
Position yourself facing the window, maybe two to three feet back. This lets that beautiful, soft light wrap around your face, smoothing out shadows for a clean, professional look.
If you notice the light is still a bit strong on one side, here's a classic photographer's trick. Grab a piece of white poster board or foam core. Hold it on the side of your face opposite the window. This simple tool acts as a reflector, bouncing light back into the shadowed areas to give you a much more even, polished illumination. It's a game-changer.
Creating a Clean, Distraction-Free Background
The background of your headshot should be exactly that—in the background. It needs to be simple and uncluttered so that you remain the undeniable focus. You don’t need to buy a professional backdrop to make this happen.
The simplest solution is a plain, neutral-colored wall. Find a spot in your home free of pictures, outlets, or distracting patterns. Shades of white, grey, or even a muted beige work perfectly because they don’t fight for attention.
No suitable wall? A bedsheet can be your best friend.
- Pick the Right Material: Go for a solid, neutral-colored sheet. A crisp white or a dark, matte grey looks incredibly professional when lit correctly.
- Hang It Smoothly: Use some tape or clamps to pull the sheet taut against a wall. The goal is to iron out as many wrinkles and folds as you can.
- Create Some Space: Make sure to stand several feet in front of your makeshift backdrop. That separation is key to creating depth and helping the background fall out of focus.
You're aiming for a background that is visually quiet. It ensures that anyone looking at your photo is drawn straight to your face—right where you want them.
Nailing Your Camera Settings
Whether you're working with a new smartphone or a trusty DSLR, a few tweaks to your settings will make a huge difference. The goal here is to achieve a shallow depth of field—that's the technical term for the classic portrait look where you are perfectly sharp and the background is beautifully blurred.
For smartphone photographers, your secret weapon is Portrait Mode. Almost all modern iPhones and Androids have this feature. It uses software to simulate what professional lenses do naturally, identifying you as the subject and artfully blurring everything behind you. It’s an instant upgrade.
If you're using a DSLR or mirrorless camera, you get more hands-on control.
- Switch to Aperture Priority (A or Av): This mode lets you pick the aperture you want, and the camera intelligently figures out the rest.
- Open Up That Aperture: Set your aperture to the lowest f-number your lens can handle (like f/1.8, f/2.8, or f/4). A lower number means a wider opening, which creates that gorgeous background blur.
- Keep Your ISO Low: Start with your ISO at its lowest setting, usually 100 or 200, to get the cleanest, most grain-free image possible.
- Grab a Portrait Lens: If you have one, a lens with a focal length between 50mm and 85mm is perfect. It captures your features naturally without any weird distortion.
For a much deeper look into lighting, check out our complete guide on creating the perfect headshot lighting setup, which gets into both natural and artificial lighting techniques. By getting these simple studio, background, and camera basics down, you’ll be well on your way to a headshot that looks anything but homemade.
Posing Techniques for a Natural and Confident Look
Let's be honest, most of us feel a little awkward when a camera is pointed our way. The secret to a headshot that looks both natural and confident isn't about striking some dramatic pose—it's about making small, intentional adjustments that feel comfortable and look fantastic on camera.
We're not going for the stiff, deer-in-the-headlights stare. The goal is to capture an expression that feels genuinely approachable and professional, a look that says you’re capable, friendly, and ready for whatever comes next.
Finding Your Most Flattering Angles
One of the biggest mistakes I see people make is facing the camera head-on. It tends to make shoulders look broad and the pose feel flat, almost like a passport photo. But a simple shift in your body can change everything.
Try turning your body about 45 degrees away from the camera, then turn your head back to face the lens. This classic photographer's trick instantly creates a more dynamic and slimming silhouette, adding depth and interest to the shot. It just works.
The most powerful poses are often the most subtle. A slight angle in your shoulders or a gentle tilt of your head can transform a photo from a static snapshot into a dynamic portrait.
As you experiment, you might find you have a "best side"—most people do! Snap a few test shots facing left and right to see which angle feels and looks most natural for you.
Mastering the Chin and Jawline
A strong, defined jawline telegraphs confidence, but it’s easy to lose in a photo if you're not posed correctly. The key is a simple, two-part move that feels a little strange but looks incredible on camera.
First, gently push your chin forward, almost like you’re extending your head toward the camera like a turtle. Then, tilt your chin slightly down. This move does two things: it separates your head from your neck to eliminate any hint of a double chin, and it sharpens your jawline for a polished, professional look. It will feel completely unnatural, but trust me on this one—the result is worth it.
Eliciting a Genuine Expression
The expression is the heart and soul of your headshot. A forced smile can look inauthentic, while no smile at all might come across as unapproachable. You're looking for the sweet spot: a genuine, relaxed expression that actually reaches your eyes.
Here are a few techniques I use to get that perfect look:
- Think of Something Pleasant: Don't just "say cheese." Instead, think about a happy memory, a funny joke, or someone you love. This will bring a natural, subtle warmth to your face that you can't fake.
- The Subtle Squint: A slight squint, often called a "squinch," engages the muscles around your eyes and signals confidence and focus. It’s the difference between a blank stare and an engaged, thoughtful look.
- Try a Closed-Mouth Smile: While a big, toothy grin can be great, a gentle, closed-mouth smile often looks more confident and professional, especially for a corporate or LinkedIn headshot.
For more specific ideas, you can also explore different approaches to posing. For instance, our guide on professional headshot poses for men offers tailored advice that can be adapted by anyone looking for a strong, confident look.
The Power of Technology in Posing
Trying to pose yourself while also holding a camera is next to impossible. This is where a tripod and a remote shutter (or your phone's self-timer) become your best friends. Setting up your camera on a tripod frees your hands and allows you to relax into your poses without fumbling with gear.
Using a remote or timer lets you fire off a series of shots without running back and forth. Even better, set your camera to burst mode to capture several frames per second. This is a fantastic way to catch those fleeting, in-between moments where your expression is most natural. You’ll be surprised how often the best shot isn't the one you were trying to get, but the one right before or after it.
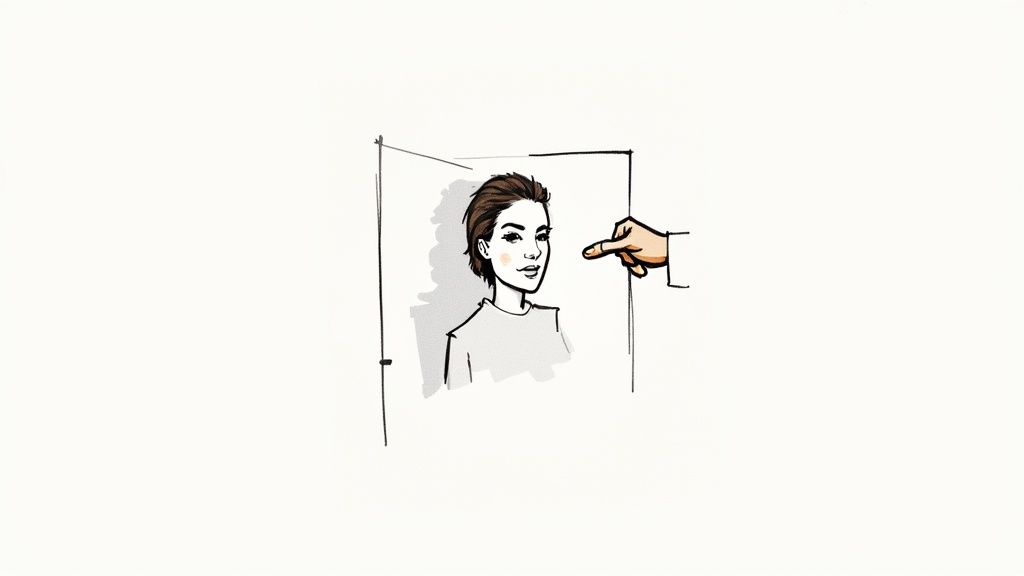
The Modern Shortcut: AI Headshot Generators
While the DIY approach gives you incredible control, it takes time and patience to get it right. If you're a busy professional, manage a remote team, or just want guaranteed studio-quality results without the hassle, there’s a powerful modern alternative that excels in convenience, affordability, and professional quality.
Enter AI headshot generators. Imagine uploading a few casual selfies and receiving a gallery of polished, professional headshots in just a few hours. This isn't science fiction; it's a practical tool that delivers an incredible return on a small investment of time and money.
Unbeatable Convenience and Affordability
The biggest draw for AI is its raw efficiency. Forget coordinating schedules, scouting locations, or setting up equipment. The entire process is done from your computer, saving you precious time. You simply upload your best recent photos, and the AI handles the rest, creating a huge variety of professional-grade images for you to choose from. It's the perfect solution for anyone needing a top-tier LinkedIn portrait or branding update on a tight deadline.
The cost savings are just as impressive. Compared to a traditional photoshoot which can cost hundreds of dollars, AI headshots are a fraction of the price. This remarkable affordability, as highlighted in headshot industry trends and cost comparisons, makes high-end professional branding accessible to everyone, from students to seasoned executives and entire businesses.
AI headshot generators are democratizing professional branding. They tear down the old barriers of high costs and logistical headaches, putting studio-quality results within everyone's grasp.
This tech is a lifesaver for businesses that need consistent, high-quality headshots for the whole team. Instead of planning a massive, expensive photoshoot, each team member can generate their own professional image from home. The result? A perfectly uniform and polished look across the company website or internal directory, achieved with minimal cost and effort.
How AI Headshot Generation Works
The process is refreshingly simple. You start by uploading a selection of clear, front-facing photos of yourself. The AI algorithm gets to work analyzing these images to learn your unique facial features. From there, it generates a completely new set of headshots that look just like you but place you in professional settings with flawless lighting and a sharp wardrobe.
- Diverse Styles: You’ll get a full portfolio of images, from corporate looks with blazers to more casual, creative options.
- Varied Backgrounds: The AI creates headshots with different backdrops, including classic studio grays, modern office environments, and even outdoor settings.
- Professional Quality: The final images are delivered in high resolution, ready to go for LinkedIn, your resume, and company websites.
With so many platforms out there, picking the right one can feel a bit overwhelming since they all have unique strengths. To find the best fit for your specific needs, check out a detailed AI headshot generator comparison for a clear breakdown of options, pricing, and the quality you can expect. This modern path offers an incredible blend of affordability, speed, and professional polish—it's the ultimate shortcut to a perfect headshot.
Simple Edits for a Professional Finish
This is where the magic happens. The final touches in post-production are what separate a decent photo from a truly professional headshot. Don't worry, you don't need to be a Photoshop wizard or have expensive software. A few quick tweaks on your phone or a free desktop app will make a world of difference.
The goal here isn't to change how you look, but to polish the image so it's a powerful, clear representation of you, ready for any platform.
Nailing the Crop and Composition
Your first and most powerful edit is the crop. A good crop directs everyone’s attention right where it needs to be: on you.
Frame the shot from the shoulders up. You want to leave just a little bit of breathing room above your head—not too much, not too little. This classic headshot composition feels personal and professional, tight enough to connect with the viewer without feeling claustrophobic.
Tweaking Light and Color
Once your composition is locked in, it's time to play with the light and color. These small adjustments can make your photo pop and look far more vibrant and true-to-life.
- Brightness and Contrast: If your photo feels a bit dark or flat, start by gently bumping up the brightness. Then, add a touch of contrast. This will deepen the darks and brighten the lights, giving your photo much-needed definition and punch.
- Color Correction: Ever notice how indoor lights can make a photo look weirdly yellow or blue? That's what you fix here. Find the "temperature" or "white balance" slider and adjust it until the whites in the image (like a shirt collar) look genuinely white. This will ensure your skin tone looks natural and not like you have a strange sunburn.
A light touch is everything. The point of editing is to enhance what’s already there, not to create a different person. Your headshot should look like you on a great day.
Light Retouching and Exporting for Success
Next up is some light retouching. Most free photo apps have a "blemish remover" or "healing tool" that works wonders. It’s perfect for getting rid of a temporary pimple that decided to show up on photo day or zapping a distracting stray hair. The key word is light—avoid going overboard. You're just removing minor distractions, not altering your core features.
Finally, you have to save your file correctly. For LinkedIn, company websites, and pretty much any online use, a high-quality JPG is your best bet.
When it comes to size, aim for a version that is at least 1000 x 1000 pixels. This ensures your headshot stays sharp and crystal clear, even on fancy high-resolution screens. No one wants a blurry first impression.
Still Have Questions About At-Home Headshots?
Jumping into the world of at-home headshots can feel a little daunting. You're probably wondering if you can really pull off a professional look yourself, or if one of those new AI tools is a better bet. Let's tackle some of the most common questions people have.
Can I Really Get a Pro-Quality Shot by Myself?
Absolutely. It's totally possible to get a fantastic, professional-looking headshot with your own gear. If you find some great natural light and really focus on nailing the pose and a few basic edits, the results can be impressive.
The real challenge, though, is consistency. Without a photographer's eye and professional lighting, it’s tough to get multiple shots that all have that same studio-level polish. The biggest hurdles are controlling the light and getting a genuinely relaxed, confident expression when you're both the photographer and the subject.
This is where AI headshot generators really shine. They deliver consistently professional quality every single time by handling the lighting, composition, and even wardrobe, taking all the guesswork out of the equation. If guaranteed professional branding without the fuss is what you're after, an AI tool offers unparalleled convenience and reliability.
It really boils down to this: DIY gives you complete creative control, but it takes work. AI offers guaranteed professional quality with incredible speed and convenience, often for less than the cost of a couple of lattes.
Is AI a Good Option for My Whole Team?
Yes, AI is a fantastic solution for teams, especially now with so many people working remotely. Trying to coordinate a traditional group photoshoot can be a logistical nightmare that costs significant time and money.
AI tools solve this problem instantly. Each person on your team can generate their own professional headshots from wherever they are, on their own schedule. The result? A perfectly uniform, high-quality look across your company’s website, LinkedIn profiles, and internal directories.
This approach doesn't just save time for individuals and coordinators; it’s also a massive cost-saving measure compared to hiring a photographer for dozens of sessions. It’s an efficient and affordable way to elevate your company's professional branding with minimal disruption.
Ready to skip the DIY hassle and get dozens of studio-quality options in minutes? SelfieToPro uses AI to turn your simple selfies into polished, professional headshots perfect for LinkedIn, team pages, and more. Get started today at SelfieToPro.