How to Take AI Headshots at Home in Minutes
Taking a professional headshot at home has never been easier, more affordable, or more convenient. All you need is your smartphone to snap a few decent selfies, and then you let an AI headshot generator work its magic to create studio-quality portraits. It’s a simple process that saves you the time, money, and hassle of a traditional photoshoot, delivering professional results in minutes.
Your Professional Headshot Is Now a DIY Project
Forget trying to find an expensive photographer who fits your schedule. The game has completely changed. Learning how to take headshots at home is all about using what you already have—your phone and a bit of creativity—to get images that look like they came straight from a professional studio, without the high cost or time commitment.
This modern approach is perfect for today's professional. With so many of us working remotely, your digital first impression on platforms like LinkedIn is your new handshake. A polished, current headshot shows you're professional and on top of your game before you’ve even said a word.
The Shift to Convenient, High-Quality Headshots
The demand for professional headshots is blowing up, mostly because we're all networking and building our professional branding online. The market for these services was pegged at around $1.5 billion in 2025, and it's only going up. But let's be honest, traditional photography is expensive and a pain to schedule, which is pushing individuals and businesses toward easier, more affordable options.
This is where cost-effective, do-it-yourself methods—especially those powered by AI—are making a huge difference. You can dig into more data on the professional headshot photography market to see these trends for yourself.
The real win here is the mix of convenience and professional quality. You're not just saving a few hundred bucks; you're taking control of your personal brand and getting dozens of amazing options without ever leaving your living room. It's the ultimate time and cost saver.
Why AI is the Ultimate Tool for DIY Headshots
This isn't about trying to become a pro photographer overnight. It's about letting smart tech do the heavy lifting for you. Here’s why AI headshots are the superior choice:
-
It’s Affordable: Skip the photographer fees that can run into the hundreds. For a fraction of that, you can generate a whole gallery of professional images, saving significant costs for both individuals and businesses.
-
It’s Incredibly Convenient: You can get this whole project done in under an hour. From taking the photos on your phone to getting back your final, polished headshots, the time savings are enormous.
-
You Get Unmatched Variety: A traditional shoot might give you a handful of good shots. AI, on the other hand, can create dozens of headshots with different outfits, backgrounds, and styles from just a few of your selfies, perfect for building a versatile professional brand.
The bottom line is you already have everything you need to get started. This guide will walk you through every step, turning your basic selfies into a powerful tool for your career.
Setting Up Your At-Home Photo Space
You don’t need a fancy studio or a ton of expensive gear to get this right. Seriously. The whole point is to capture clean, high-quality source photos using your smartphone, which you already have. Nailing your at-home setup is the most important part of learning how to take headshots at home that the AI can turn into something amazing.
It all starts with your phone's camera. Modern smartphones are incredibly powerful, but a few quick tweaks will make a world of difference for your final results.
Optimize Your Smartphone Camera Settings
First things first, always use your phone's main rear-facing camera. It’s tempting to use the selfie cam, but the main camera almost always has a better sensor and lens, giving you sharper, higher-resolution images. That extra detail is exactly what the AI needs to do its best work.
Before you start snapping, jump into your camera settings and make these key adjustments:
-
Turn Off Portrait Mode: I know, the blurry background is nice. But for this specific purpose, it actually gets in the way. The AI can create a much cleaner, more professional background blur if you give it a photo that's sharp from front to back.
-
Enable Grid Lines: This is a classic photographer's trick that puts a simple 3x3 grid on your screen. It helps you perfectly frame your shot using principles like the rule of thirds, making your composition instantly better.
-
Clean Your Lens: This sounds almost insultingly simple, but you'd be surprised. A quick wipe with a microfiber cloth can be the difference between a crisp, clear shot and a hazy, smudged mess.
Remember, you aren't trying to take the final headshot yourself. Your only job is to give the AI clean, well-lit, high-quality data. The AI handles the studio polish, the professional backgrounds, and even the wardrobe changes.
Find the Best Lighting in Your Home
Lighting is everything. It’s the single most important factor in photography, and thankfully, you have the best light source available for free: a window.
Find a window with soft, indirect sunlight and stand facing it. This natural light will illuminate your face evenly, minimizing harsh shadows and creating a flattering, professional glow. Avoid standing in direct, blazing sun—it will make you squint and cast ugly, hard-edged shadows.
If the sun is just too bright, you can easily soften it by hanging a thin white sheet over the window. It acts as a giant diffuser, just like the pros use.
No good window? No problem. Grab a couple of household lamps. Place one on each side of you and slightly in front to mimic that soft, even light you’d get from a window. Just make sure the light isn't creating any harsh glare on your face.
Choose a Simple, Uncluttered Background
The last piece of the puzzle is what’s behind you. The ideal background is a plain, neutral-colored wall—think white, off-white, grey, or beige. This keeps the focus entirely on you and gives the AI a clean slate to work with.
Take a moment to clear away any distractions. That means no picture frames, no weird corners of furniture, and definitely no clutter. The simpler, the better. If you want to go deeper on this, we have a whole guide on the best headshot backgrounds and why they work. A clean background makes it incredibly easy for the AI to separate you from your surroundings, which leads to much more realistic and polished final images.
Nailing Your On-Camera Look and Presence
Okay, your at-home studio is set up. Now, it's time to focus on the most important part of the headshot: you. A great photo is more than just good lighting; it's a reflection of your professional self, and getting your wardrobe and expression right is what makes people see you as confident and authentic.
Dress the Part: Choosing Your Wardrobe
Your clothing plays a massive supporting role in your headshot. The main goal is to keep the focus squarely on your face, which means simple and classic is always the winning strategy.
Solid colors are your best friend here. Think about deep blues, grays, greens, or maroons that flatter your skin tone. A straightforward neckline—like a crewneck, a V-neck, or a simple collared shirt—looks fantastic on camera without stealing the show.
What you decide not to wear is just as critical. Stay away from busy patterns, big logos, or any distracting graphics. These can confuse the AI and, more importantly, pull the viewer's eye away from you. It's also smart to avoid anything too trendy, as it will instantly date your photo in a year or two.
To make it even easier, here's a quick reference guide to help you pick the perfect outfit from your closet.
Wardrobe Choices for Professional Headshots
| Do Wear (Best Options) | Avoid Wearing (Worst Options) |
|---|---|
| Solid colors (blue, grey, green, maroon) | Busy, distracting patterns or prints |
| Simple, classic necklines (crewneck, V-neck, collared shirt) | Large or visible brand logos |
| Well-fitting, wrinkle-free fabrics | Wrinkled, worn-out, or ill-fitting clothes |
| Layers like a simple blazer or cardigan | Overly bright colors like neons |
| Clothing that makes you feel confident | Anything too trendy that will quickly look dated |
Ultimately, your outfit is a key piece of that all-important first impression. If you want to dive deeper into why these choices matter, understanding the psychology of first impressions can give you a real edge in projecting the exact image you want.
Find Your Expression: It's All About Authenticity
Here’s some good news: the era of the stiff, cheesy corporate smile is over. The new standard in professional branding is authenticity. People want to connect with a real person, not a cardboard cutout.
This shift works perfectly for taking headshots at home. You don't need to stress about holding one "perfect" smile for an hour. Your actual goal is to capture a range of expressions. Think of it as giving the AI a full picture of your professional personality.
The real secret to a natural expression isn’t to think "smile." It's to think of something that makes you genuinely smile—a recent win at work, a funny text from a friend, or looking forward to your vacation. That small mental shift is the difference between a forced grin and an authentic expression.
During your session, make sure to get a few different looks. Capture some shots with a warm, open smile. Then, try some with a more neutral, confident look. You can even take a few that are more thoughtful or serious. This variety is gold because it provides a rich dataset for the AI, ensuring your final headshots give you plenty of options for any situation you might need them for.
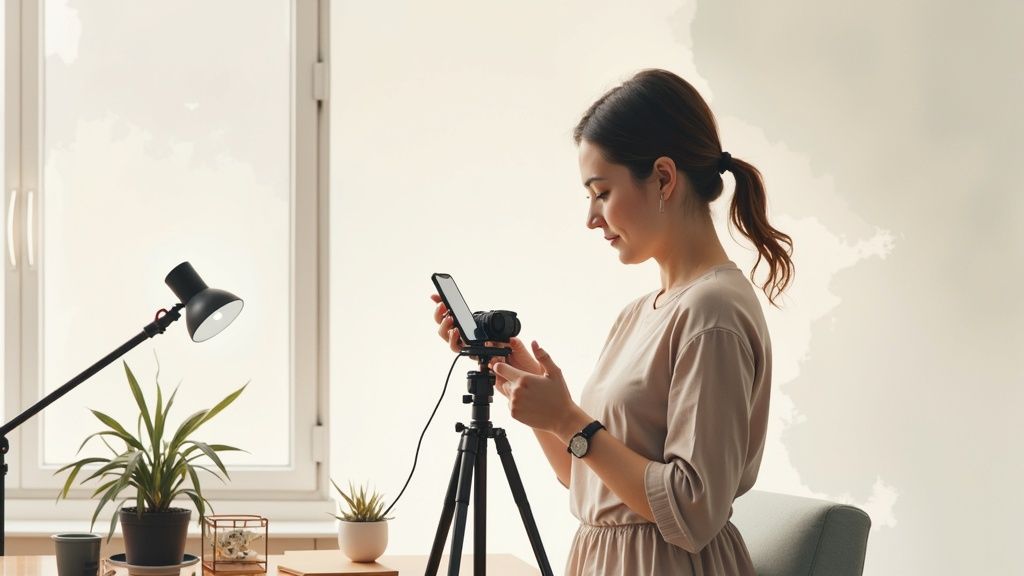
Taking the Right Photos for AI Processing
Alright, this is where the magic really starts. You’ve got your setup dialled in and you’re looking the part. Now it's time to capture the raw material—the selfies—that the AI will use to build your new professional headshots. The quality of your final images is directly tied to the quality of the photos you feed the system, so don't rush this part.
Think of it like cooking: even the best chef can't make a masterpiece with subpar ingredients. Your selfies are those ingredients. The goal isn't to get one "perfect" shot, but rather to create a small, diverse gallery of photos that gives the AI a complete picture of your facial features from a few different perspectives.
This quick infographic breaks down the essentials for your at-home session—from wardrobe and grooming to your expression.
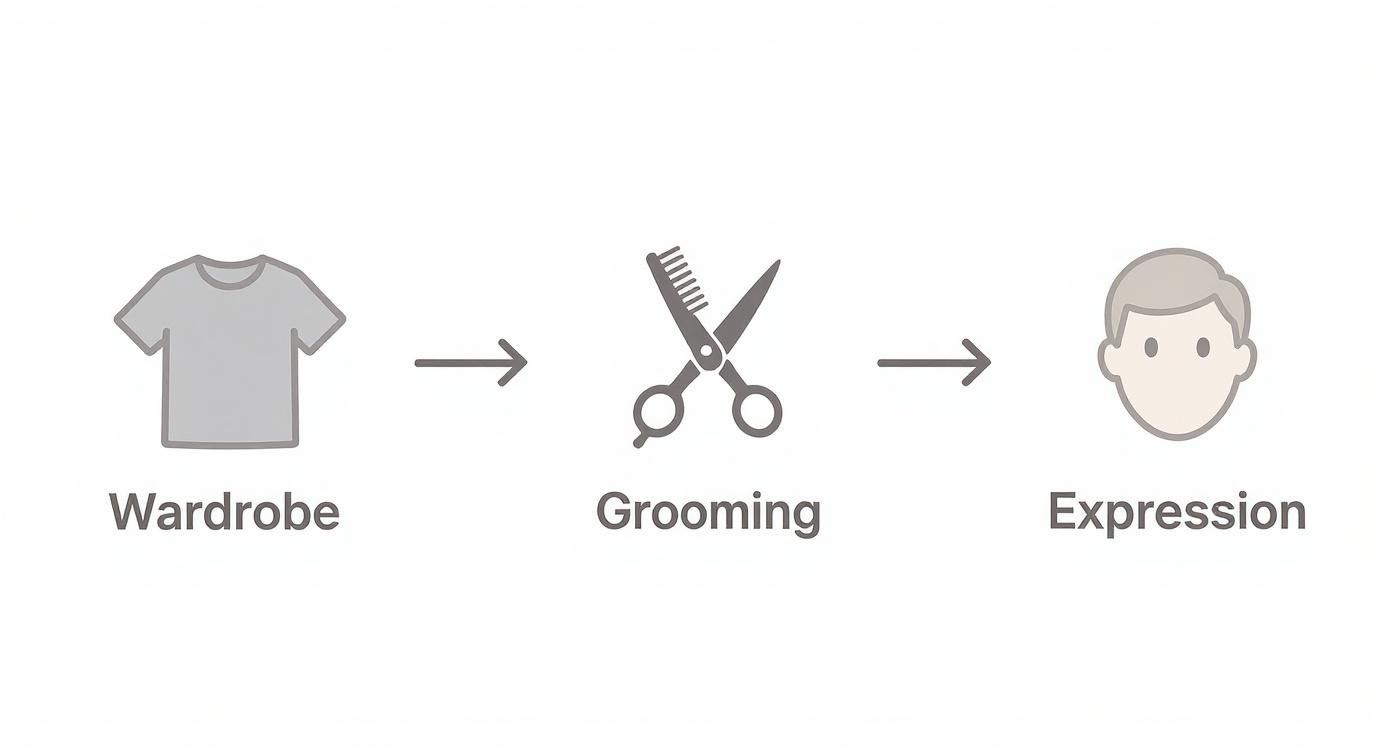
As you can see, keeping it classic and simple is almost always the most effective approach.
Your Simple Shot Checklist
To make this dead simple, just follow this quick shot list. You’re aiming for around 10 to 15 high-quality photos in total. That number gives the AI plenty of data to work with without you having to spend an hour taking pictures.
Framing and Angles
First up, keep your framing consistent. You’ll want to position yourself so the camera captures you from the chest up. This is the standard for professional headshots, and it gives the AI the right amount of visual information to generate a realistic upper body.
Now, let's talk angles. Variety is your best friend here.
-
Straight On: Grab a few shots looking right down the barrel of the lens.
-
Slightly Left/Right: Gently turn your head just a bit to the left for a few shots, then repeat for the right side.
-
Subtle Tilts: Try tilting your head slightly in a couple of images.
Mixing up the angles like this helps the AI build a more accurate 3D model of your face, which leads to much more realistic and varied headshots.
Don't go overboard with the angles. We're talking subtle shifts here, not dramatic profile shots. The idea is to capture the natural contours of your face from slightly different viewpoints, just like someone would see you in a normal conversation.
Capturing a Range of Expressions
Just as important as changing your angles is changing your expression. A single, frozen smile won’t give you the versatile set of headshots you need for different professional situations. You want a portfolio that covers all your bases.
Aim for this simple range:
-
Neutral Expression: A calm, confident look without a big smile.
-
Soft Smile: A gentle, closed-mouth smile that comes across as friendly and approachable.
-
Full Smile: A genuine, happy smile, maybe showing a little teeth.
Getting this variety ensures you’ll have the perfect headshot for any scenario, from a serious LinkedIn profile to a warm and welcoming photo for your company’s website. If you want a deeper dive into what makes an input photo truly great, check out our detailed guide on taking the perfect photos for AI headshots.
Pro Tips for Crystal-Clear Photos
Finally, let’s make sure every photo you take is tack-sharp. A blurry source photo will only ever result in a blurry AI headshot, so stability is absolutely key. The easiest way to kill camera shake is to not hold the camera at all.
Use your phone's self-timer. Set it for 3-5 seconds—that’s plenty of time to hit the shutter button and get into a natural position without feeling rushed. For even better results, prop your phone on a stack of books or use a cheap smartphone tripod. This tiny step makes a massive difference in image sharpness and is a non-negotiable part of getting this right.
You’ve done the hard part. Your at-home photo setup is ready, and you've got a collection of great selfies. Now comes the fun part—seeing all that effort pay off. This is where AI steps in and completely changes the game, turning your simple photos into studio-quality headshots.
The process itself is surprisingly simple. You take the selfies you just shot and upload them to an AI headshot generator like SelfieToPro. The AI uses your photos to build a digital model of you, and from there, it can generate dozens of unique, hyper-realistic portraits. It’s a world away from the old routine of scheduling a photographer, traveling to a studio, doing the shoot, and then waiting days or even weeks to see a handful of edited images.
Speed, Affordability, and Unmatched Variety
The biggest wins here are speed, cost, and variety. Forget a multi-day ordeal; you can upload your photos and get a full gallery of professional options back in hours, sometimes even minutes. For any busy professional, that convenience alone is a massive advantage.
The cost savings are just as dramatic. The photography world is getting more expensive, with reports showing that 65% to 77% of professional photographers are dealing with rising business costs. Naturally, those costs get passed on to clients, making affordable, high-quality alternatives more attractive than ever. You can dig deeper into current headshot trends to see what's driving these changes.
AI headshot generators are a practical fix. They make high-quality professional branding accessible to everyone, giving you an entire portfolio of images for a fraction of what a single traditional photoshoot would run you.
But maybe the most impressive benefit is the sheer variety you get. The AI can place you in different professional settings, put you in a range of business attire like suits or blazers, and create portraits with various lighting styles. It does all of this using the same set of selfies you took in your living room. You get a complete branding package without ever having to change your outfit or find a new location.
This table really puts the differences into perspective, highlighting just how much more efficient the AI approach is.
AI Headshots vs Traditional Photoshoots
| Feature | AI Headshots | Traditional Photoshoot |
|---|---|---|
| Cost | Low, fixed price (typically under $50) | High, variable cost ($250 - $1,500+) |
| Time | Under an hour from start to finish | Days to weeks (scheduling, shooting, editing) |
| Convenience | Done from anywhere, anytime | Requires travel and in-person scheduling |
| Variety | Dozens of outfits, backgrounds, and styles | Limited to the options available on shoot day |
| Revisions | Easy and fast to generate new options | Often involves extra fees and delays for edits |
When it comes down to it, using AI for your headshots is simply the smartest way to get professional results on your own terms. It gives you complete control over your brand image while offering a level of flexibility and value that traditional methods just can't match.
Got Questions About At-Home Headshots? We've Got Answers
Stepping into the world of DIY headshots for the first time? It’s totally normal to have a few questions. Getting clear on the process beforehand is the smart way to go, and it'll give you the confidence to get some amazing shots.
Let's tackle some of the most common things people ask.
Can I Really Get Professional Quality from My Phone?
Yes, absolutely. You don’t need a $3,000 camera to get this done. The latest smartphone cameras are incredibly powerful, easily outperforming professional gear from just a few years back.
The secret isn't the camera itself; it's about giving the AI clean, high-quality source images to work with. When you nail the lighting, find a simple background, and make sure your shots are in sharp focus, you’re handing the AI generator everything it needs to create a polished, high-resolution portrait. The whole system is built to work with the camera you already have in your pocket.
Think of it this way: your phone’s job is just to capture the raw data of your face. The AI does the heavy lifting—acting as the professional photographer, editor, and studio all in one.
How Many Photos Do I Actually Need to Upload?
It's tempting to think that more is better, but what really matters here is quality over quantity. Most AI headshot generators, including ours, find the sweet spot to be between 10 and 15 high-quality, distinct selfies.
This range gives the AI enough variety in your angles and expressions to build a truly accurate model of your face. Submitting too few photos can lead to a less accurate result, while uploading a ton of very similar-looking shots doesn't really add any new, useful information for the AI to learn from.
What if I Don't Like the First Batch of AI Headshots?
This is one of the best parts about using AI over a traditional photoshoot. If the first set of results isn't quite what you were hoping for, you're not stuck with them. More often than not, the issue comes back to the quality of the selfies you uploaded.
If you want to try again, take a quick look at your original photos and ask yourself:
-
How was the lighting? Was it soft and even, or were there harsh, distracting shadows on your face?
-
Was there enough variety? Did you provide a good mix of different angles and expressions, or did they all look pretty much the same?
-
Were the images clear? Check for any blurriness. Every shot needs to be sharp and in focus.
A few small tweaks to your source photos can make a massive difference in the final output. Because AI is so fast and affordable, it’s a low-risk way to keep generating new batches until you land on the perfect headshots for your brand. Learning how to take great headshots at home is a skill, and AI gives you the freedom to perfect it.
Ready to create a portfolio of stunning, professional headshots in minutes? SelfieToPro uses advanced AI to turn your simple selfies into studio-quality portraits, giving you the convenience, affordability, and variety you need to elevate your brand. Get started today at https://www.selfietopro.com.